
Ultimate Checklist for the Correct Order to Clean a House
The Core Principles Behind the Correct Order to Clean a House
The correct order to clean a house is to declutter and stage supplies first, complete high dusting from top to bottom, wipe down surfaces from dry to wet, and finish with the floors last. Following this structured sequence prevents falling debris from dirtying freshly cleaned areas and eliminates unnecessary rework. In fact, the average American spends about 3 to 4 hours a week cleaning, which translates to roughly 150 to 200 hours every year. Tackling chores randomly wastes much of that time re-wiping counters or sweeping up dust that fell from ceiling fans onto mopped floors.
To clean efficiently, professional housekeepers rely on four foundational rules:
- Top-to-Bottom Flow: Gravity ensures that dislodged debris, pet hair, and dust particles always fall downward. If you vacuum first and dust your ceiling fan blades later, you will have to vacuum again.
- Dry Before Wet: Always remove dry dust, loose crumbs, and pet hair before introducing liquid cleaners. Wiping dry dirt with a wet rag creates a muddy slurry that smears across surfaces, turning a quick dusting job into an intensive scrubbing session.
- Left-to-Right (or Clockwise) Perimeter: Moving around a room in a single directional pattern guarantees you will not miss a single corner or accidentally clean the same nightstand twice.
- Clean to Dirty: Always begin with less soiled zones before tackling heavily grimy areas to keep your cleaning tools cleaner longer.
Upgrading your supplies makes a massive difference in how quickly you finish. Switching from cotton rags to split-fiber microfiber cloths can reduce chemical usage by up to 90% because microfiber creates an electrostatic charge that traps dust instead of just pushing it into the air. Adopting simple habits for a dust-free comfortable home keeps dirt from accumulating between major cleaning days.
Step 1: Declutter and Stage Supplies First
Trying to clean around stray mail, out-of-place shoes, and scattered toys causes extreme decision fatigue and forces you to start and stop your cleaning rhythm. Before picking up a duster or spray bottle, grab an empty laundry basket or storage bin to stage items that belong in other rooms.
- Walk through the entire living area and place stray items into your collection basket.
- Clear every kitchen counter, bathroom vanity, and tabletop so surfaces are completely bare.
- Load all dirty dishes directly into the dishwasher. A modern dishwasher uses roughly 3.5 times less water than washing dishes by hand, making it both faster and more resource-efficient.
- Carry your multi-surface cleaner, glass spray, duster, scrub brushes, and color-coded microfiber cloths in a portable caddy.
Batching tasks this way keeps you moving forward without constant trips to the utility closet. For a detailed breakdown of planning your cleaning flow, explore the best order to clean your house (so you don’t waste time) on The Home Feel.
Step 2: High Dusting and Vertical Surface Care
Once flat surfaces are clear, direct your attention upward. Begin at the highest architectural point of the room and work steadily toward the baseboards.
- Use an extendable microfiber duster to capture cobwebs in ceiling corners and around crown molding.
- Dust ceiling fan blades, recessed lighting, and hanging light fixtures.
- Wipe down upper window frames, horizontal window blinds, and drapery rods.
- Dust vertical wall art, wall-mounted televisions, open shelving, and doorframes.
- Dust switch plates, electrical outlet covers, and mid-level furniture tops.
Because you have not cleaned the floors or lower furniture yet, any falling dust will settle harmlessly on uncleaned surfaces below, ready to be swept or vacuumed away in the next phase.
Strategic Room-by-Room Sequence for Maximum Efficiency
When deciding which room to clean first, professional workflows leverage the 80/20 rule: approximately 80% of household dirt and grime originates from just 20% of your daily activities—concentrated heavily in the kitchen and bathrooms.
Tackling demanding spaces when your energy is highest prevents burnout and maintains consistent cleanliness throughout the home.
| Room Priority | Focus Areas | Key Cleaning Goal |
|---|---|---|
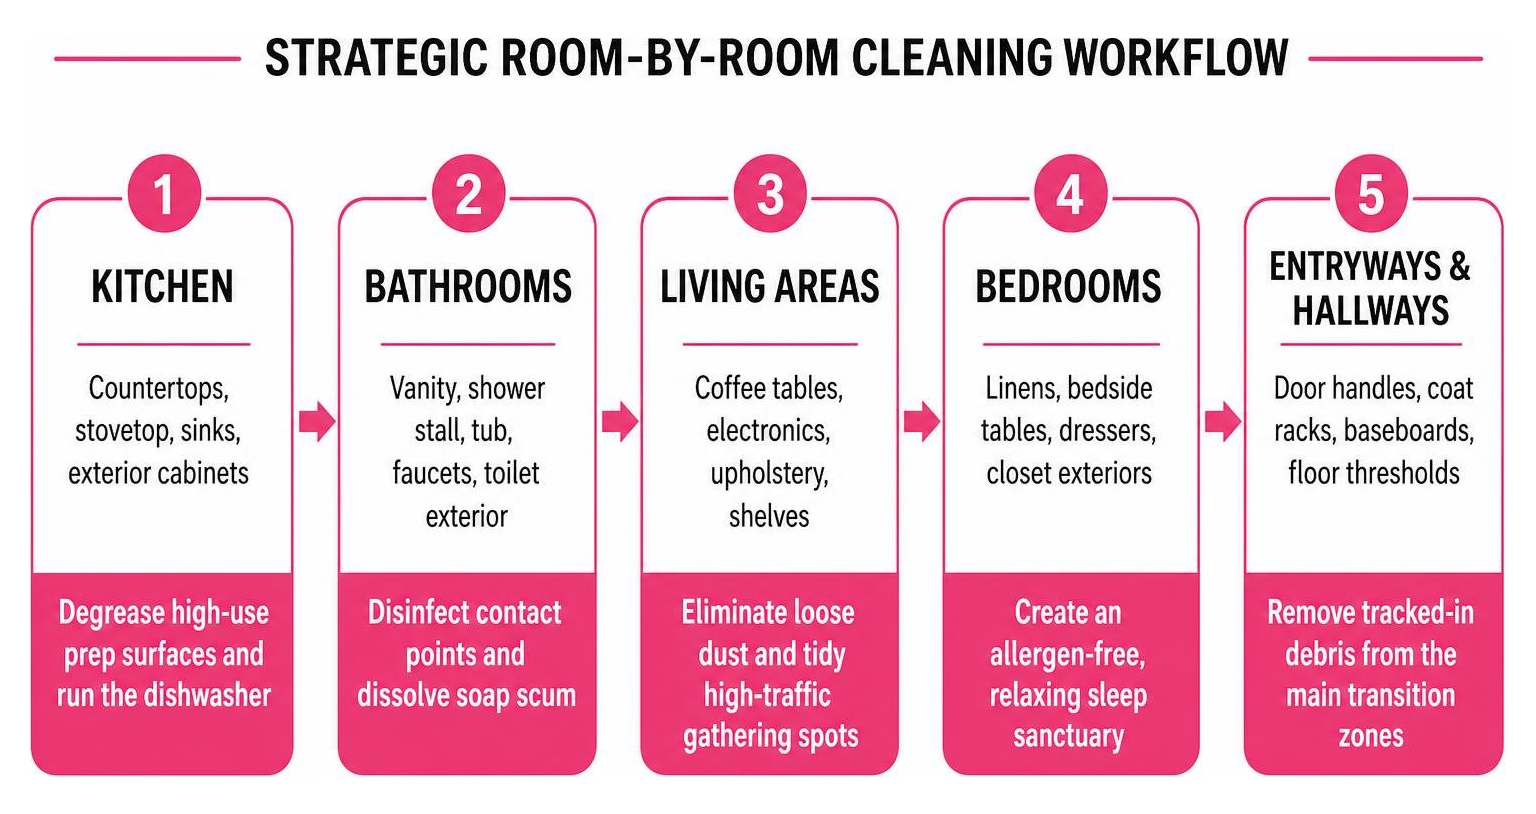
| 1. Kitchen | Countertops, stovetop, sinks, exterior cabinets | Degrease high-use prep surfaces and run the dishwasher |
| 2. Bathrooms | Vanity, shower stall, tub, faucets, toilet exterior | Disinfect contact points and dissolve soap scum |
| 3. Living Areas | Coffee tables, electronics, upholstery, shelves | Eliminate loose dust and tidy high-traffic gathering spots |
| 4. Bedrooms | Linens, bedside tables, dressers, closet exteriors | Create an allergen-free, relaxing sleep sanctuary |
| 5. Entryways & Hallways | Door handles, coat racks, baseboards, floor thresholds | Remove tracked-in debris from the main transition zones |
Maintaining a clean living space requires understanding essential tips for effectively cleaning and disinfecting high-touch contact points properly without cross-contaminating living zones.
Room-by-Room Breakdown: The Correct Order to Clean a House Efficiently
Following the right room progression ensures that clean areas remain clean while you finish the rest of the house. Step-by-step room guidelines, such as those found in sprucebath.com’s practical room-by-room guide, demonstrate how consistent workflows produce professional results.
1. Kitchen (The Deep-Grime Zone)
- Spray your stovetop and exterior range hood with a degreasing multi-surface cleaner to let it loosen dried splatters.
- Wipe down upper cabinet doors and the exterior surfaces of small appliances (microwave, toaster, coffee maker).
- Wipe refrigerator and oven exteriors. (Note: Thorough cleaning of the interior of your oven or the interior of your refrigerator is treated as an optional add-on service during professional cleanings).
- Scrub and disinfect the sink basin, polish the faucet fixture, and wipe down all cleared countertops.
2. Bathrooms (The Sanitation Station)
- Apply tile and tub cleaner to the shower walls and bathtub; let the product dwell according to the label directions to dissolve soap scum without excessive scrubbing.
- Spray bathroom mirrors with glass cleaner and wipe with a clean glass-weave microfiber cloth.
- Wipe down the sink vanity, faucet handles, and soap dishes.
- Rinse the shower and tub walls thoroughly.
- Clean the toilet last: wipe down the handle, tank, exterior lid, seat, and base using dedicated disposable wipes or a color-coded cloth reserved strictly for toilets, then scrub the interior bowl with a toilet brush.
3. Living Room and Common Areas
- Fluff throw pillows and vacuum fabric sofa cushions using an upholstery attachment.
- Wipe down hard furniture: coffee tables, end tables, media consoles, and bookshelves.
- Clean electronics, remotes, and switch plates with a lightly dampened microfiber cloth (never spray cleaners directly onto electronic devices).
4. Bedrooms (The Restful Reset)
- Strip bed sheets, pillowcases, and duvet covers and place them into the wash; remake the bed with fresh linens.
- Dust nightstands, headboards, dressers, and lamp bases from top to bottom.
- Organize items on top of dressers, leaving surfaces completely clear of clutter.
The Proper Floor Cleaning Order Across Every Room
Floors represent the absolute final step in every room’s cleaning process. Cleaning floors prematurely means you will step on wet surfaces, track dirt between rooms, or drop dust from high shelves right back onto clean hardwood.
To clean floors properly without spreading dirt:
- Dry Vacuum First: Use a vacuum cleaner equipped with a HEPA filter to thoroughly pull up pet hair, grit, and loose dander from all carpets, area rugs, and hard surfaces. Make sure to vacuum under the edges of furniture and along baseboard crevices using an edging attachment.
- Sweep Tight Corners: If you have tight corners behind bathroom fixtures or laundry machines where a vacuum head cannot fit, use an angled broom to sweep debris into an open path before vacuuming.
- Mop From the Deepest Corner Outward: Always start damp mopping at the corner farthest from the room’s entrance and work backward toward the doorway. This prevents stepping on wet floors and leaving shoe footprints behind.
- Use Dual-Bucket or Microfiber Flat Mops: Avoid soaking hardwood or laminate floors with dripping wet string mops. Use a damp microfiber pad system that releases minimal water and dries quickly.
Establishing Cleaning Frequencies: Daily, Weekly, and Deep Cleans
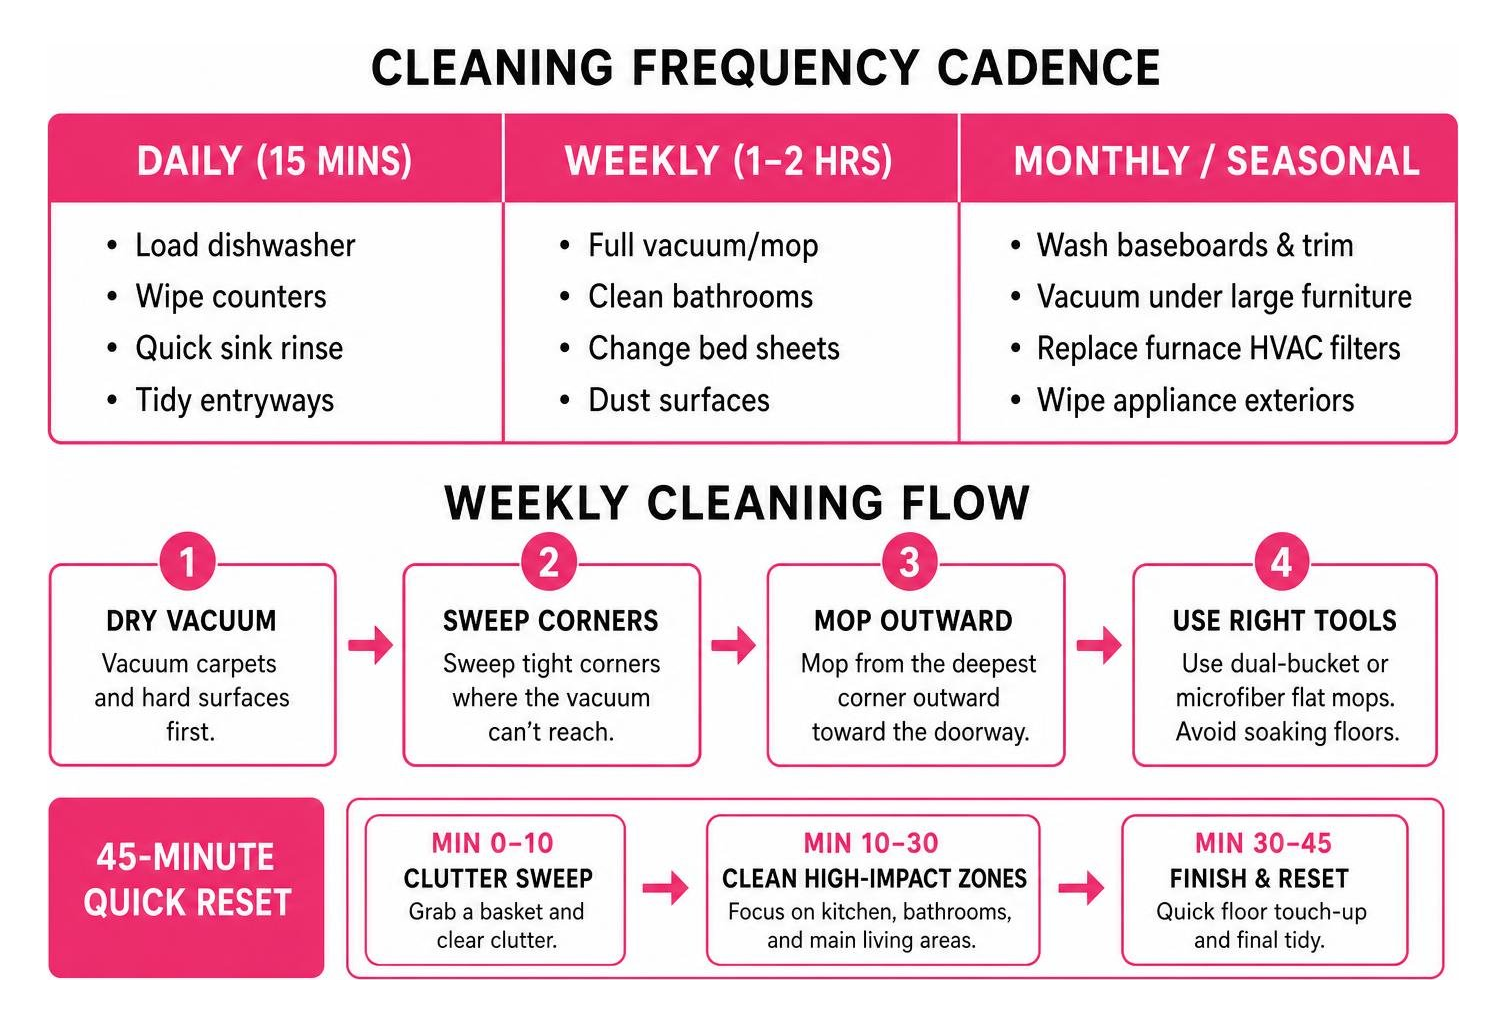
A clean home is sustained through regular maintenance rather than exhausting, all-day weekend cleaning marathons. By breaking tasks into daily, weekly, monthly, and seasonal cadences, you prevent dirt and soap scum from bonding to surfaces.
To stay on track throughout the week, refer to our weekly guide to maintain a clean home. For a master overview of home maintenance tasks, consult the ultimate 8-step cleaning checklist for 2026 on Cleaning Checklist.
A 45-Minute Quick Reset: The Correct Order to Clean a House Under Time Pressure
When guests are on their way or your schedule is packed, you do not need to clean every baseboard to make your home look fresh. Use a strict 45-minute timed sequence focused exclusively on high-impact zones:
- Minutes 0–10 (Clutter Sweep): Grab a laundry basket and run through the main entryway, kitchen, and living room. Collect stray toys, clothes, and clutter, moving them to a laundry room or closet out of sight.
- Minutes 10–20 (Kitchen Reset): Load all sink dishes into the dishwasher, wipe down central countertops, and buff the kitchen sink fixture.
- Minutes 20–30 (Bathroom Refresh): Wipe the bathroom vanity mirror, wipe down the sink basin, replace hand towels with fresh ones, and give the toilet bowl a quick scrub.
- Minutes 30–45 (Floor Express): Run a vacuum or dry microfiber floor sweeper through high-traffic walkways in the entryway, living room, and kitchen.
Managing Seasonal and Deep Cleaning Cycles
Seasonal resets handle the hidden grime that standard weekly routines do not cover. Every three to six months, schedule time to tackle deeper maintenance items:
- Wipe down interior baseboards, door moldings, and door faces using a damp microfiber cloth with warm water and mild dish soap.
- Vacuum air return vents, exhaust fan covers, and replace whole-house furnace filters to keep dust from circulating through your living spaces.
- Vacuum under large sofas, heavy dressers, and behind entertainment units.
- Detail the tracks of sliding patio doors and double-hung windows.
When you want to understand the exact scope of thorough restorative cleans, check out everything you need to know about deep cleaning your home.
Frequently Asked Questions about Cleaning House in the Proper Sequence
Which room should always be cleaned first?
The kitchen should almost always be cleaned first. It accumulates the heaviest grease, food debris, and daily mess. Tackling the kitchen early gets dirty dishes washing in the appliance right away and ensures you have high energy for degreasing stovetops and sanitizing food preparation counters.
Why should you always dust before vacuuming or mopping?
Dusting after vacuuming forces airborne dust, pollen, and debris to settle directly onto your newly cleaned floors, requiring you to vacuum a second time. Furthermore, sweeping or vacuuming dry dirt before mopping prevents you from turning dry particles into a muddy layer of wet sludge that smears across tile and hardwood.
How do you prevent cross-contamination between bathrooms and kitchens?
Use a color-coded microfiber system to keep tools strictly separated. For instance, assign blue cloths to glass and mirrors, yellow cloths to kitchen surfaces, green cloths to general dusting, and red or pink cloths exclusively to bathrooms. Never use the same rag, sponge, or scrub brush in both the bathroom and the kitchen.
Conclusion
Establishing a consistent, top-to-bottom cleaning sequence transforms house cleaning from an unpredictable chore into an efficient, repeatable routine. By decluttering first, working from high fixtures down to baseboards, handling dry dust before wet cleaners, and finishing with floors, you protect your time and keep every room looking its best.
If keeping up with deep cleaning tasks feels overwhelming, our experienced team is here to help. With over 32 years of residential cleaning experience and more than 279,000 cleans completed, Affordable Maids provides dependable, fully bonded, and insured cleaning care throughout the greater Pittsburgh region. Explore our professional deep cleaning services to reset your home from top to bottom today.