
How to Master Dusting Techniques in Less Than an Hour a Day
The Best Way to Dust a House Without Cleaning Twice
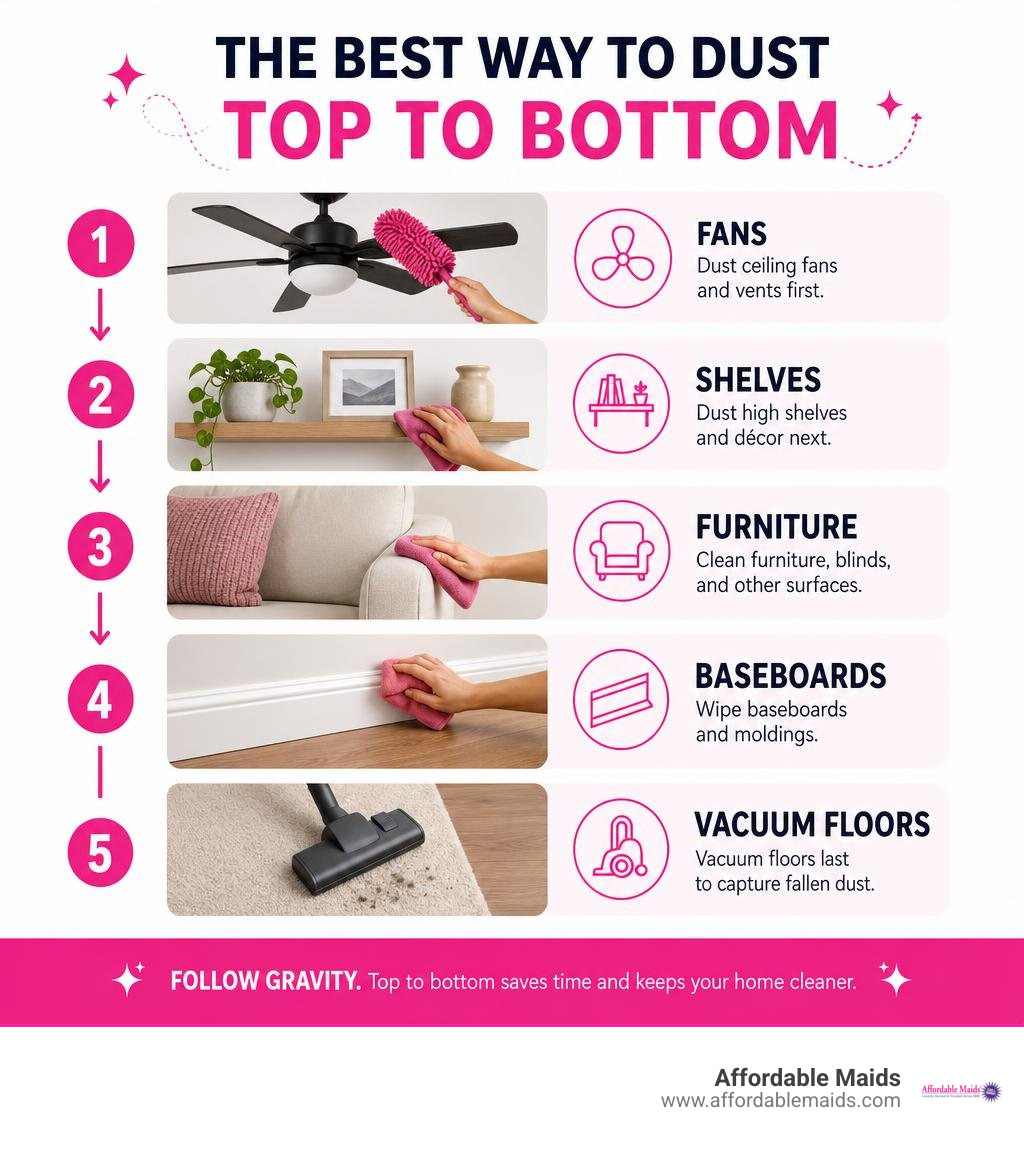
The best way to dust a house is simple: use a clean microfiber cloth, work from the highest surfaces down, and vacuum the floors last. Start with ceiling fans, vents, and high shelves. Then clean furniture, blinds, and baseboards. Finish with a HEPA-filter vacuum to capture the dust that fell while you worked.
This order matters because dust follows gravity. Fine particles can float in the air for hours, while heavier dust settles quickly. By cleaning top to bottom, you avoid dropping dust onto surfaces you just wiped – and can cut wasted cleaning time compared with dusting at random.
For busy households, a quick weekly pass over visible surfaces plus a monthly deep dusting of fans, vents, and under-furniture areas is often enough. Homes with pets, allergies, open windows, or lots of foot traffic may need more frequent touch-ups.
The following guide walks you through a faster, more practical dusting routine that helps keep dust from taking over your home.
Essential Dusting Tools: What Works and What to Avoid
Before wiping down a single surface, having the proper gear makes all the difference between eliminating dust and merely relocating it. Dust consists of dead skin cells (which make up about 40% of indoor dust), hair, outdoor soil, fabric fibers, and microscopic particles. When you use tools that flick these particles into the air, they stay suspended before settling right back down on your furniture.
Equipping yourself with tools designed to mechanically trap debris ensures you clean each surface only once.
Is Microfiber the Best Way to Dust a House Efficiently?
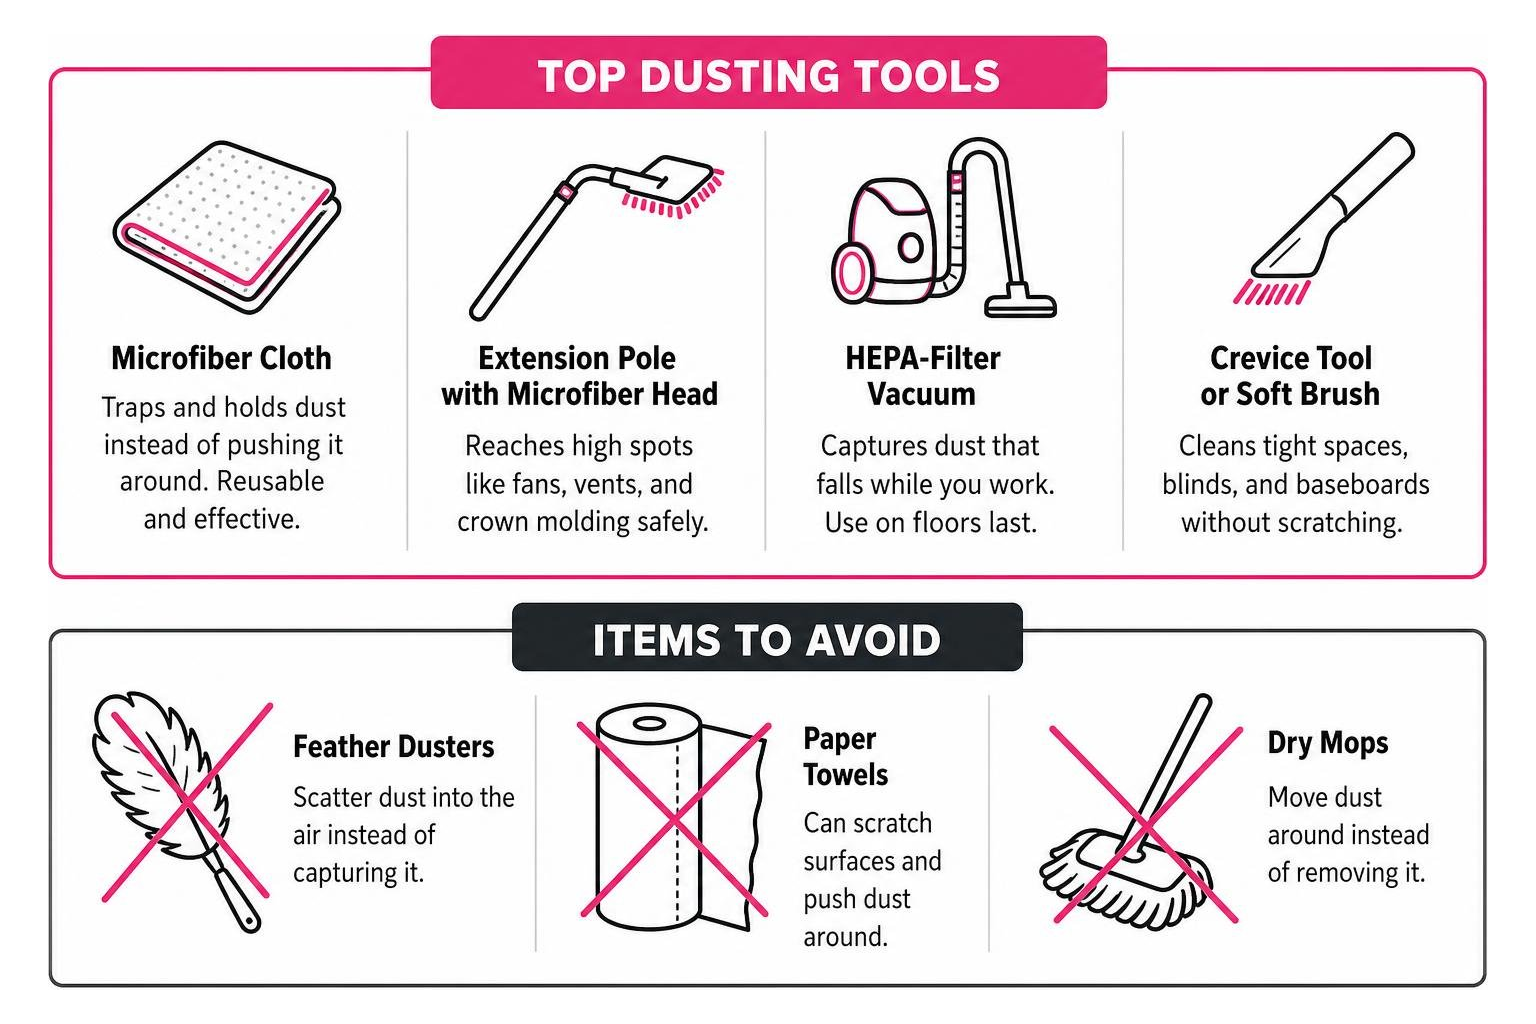
Microfiber is widely considered the gold standard for household cleaning, and for good reason. Unlike conventional woven cotton, microfiber features split synthetic fibers that create millions of tiny hooks. These fibers generate a natural electrostatic charge as they glide across hard surfaces, attracting and holding onto fine dust instead of pushing it around.
For routine, light surface cleaning, a dry microfiber cloth works wonders. When tackling sticky grime, heavy pollen, or surfaces in high-traffic zones, lightly misting the cloth with water provides extra grab. Understanding why damp microfiber captures dust effectively helps protect finishes while preventing moisture from turning dry debris into muddy streaks. Best of all, quality microfiber towels are washable and reusable for hundreds of cycles, making them both effective and practical.
Tools to Eliminate from Your Cleaning Arsenal
Traditional feather dusters might look charming, but they are notorious for scattering lightweight particles directly into the room’s airflow. Instead of capturing debris, the stiff quills fling dust into the surrounding air where it floats before landing back on your cleaned tables.
Paper towels are another common culprit to avoid. Wood pulp fibers in paper towels are abrasive enough to leave micro-scratches on glossy furniture, delicate electronics, and acrylic surfaces. Furthermore, dry paper towels lack electrostatic attraction, meaning they push debris across the surface rather than lifting it away.
Specialized Tools for Reaching Tricky Spots
To clean high architectural details and tight crevices safely without hauling heavy ladders from room to room, keep these specialized items in your cleaning kit:
- Telescopic extension poles with bendable microfiber heads: Perfect for reaching vaulted ceiling corners, crown molding, and the tops of tall wardrobes.
- Vacuum brush attachments: Soft-bristled dusting brushes paired with a vacuum capture loose debris from air return grilles and delicate fabric lampshades without scratching.
- True HEPA filtration vacuum: A vacuum equipped with a True HEPA filter ensures that 99.97% of particles as small as 0.3 microns remain sealed inside the canister rather than blowing back into your living space.
- Soft-bristled paintbrushes: An ordinary dry craft or paintbrush quickly whisks dust out of intricate wood carvings, louvered cabinet doors, and textured picture frames.
- Compressed air canisters: Excellent for dislodging trapped dust within computer keyboards, audio equipment vents, and entertainment consoles before wiping down exterior housings.
The Best Way to Dust a House: A Top-to-Bottom Strategy
Dusting from top to bottom reduces cleaning time by 30-40% compared to random dusting patterns. By letting gravity do the work, any dislodged particles fall downward onto surfaces you have not reached yet, preventing you from having to clean the same spot twice.
Step 1: High Ceilings, Fans, and Vents
Always start at the highest architectural points of the room. Turn off ceiling fans and HVAC blowers so circulating air does not blow particles across the room while you work.
To clean ceiling fan blades without raining debris onto your bed or rug, slip an old pillowcase over each blade one at a time. Pressing gently with your hands on both sides of the blade, slide the pillowcase back toward you; the built-up grime stays trapped safely inside the fabric sleeve. Follow up by sweeping crown molding and ceiling corners with an extendable pole to capture cobwebs. For HVAC vents, review these essential tips for effectively cleaning grilles using a brush vacuum attachment before wiping the metal slats.
Step 2: Mid-Level Surfaces, Blinds, and Electronics
Once high architectural features are clear, move down to eye-level areas. Work around the room in a single clockwise or counterclockwise direction to keep your movement efficient.

When cleaning window treatments, close horizontal blinds flat and wipe horizontally with a microfiber cloth, then reverse the slat direction and wipe the other side. Power down electronic displays and televisions before cleaning, allowing screens to cool so static does not fight your microfiber cloth. For detailed material care, this expert surface cleaning guide highlights the value of clearing decorative objects entirely off shelves rather than wiping around them.
Step 3: Baseboards, Flooring, and Under Furniture
The final phase tackles everything near the floor where falling debris has gathered.
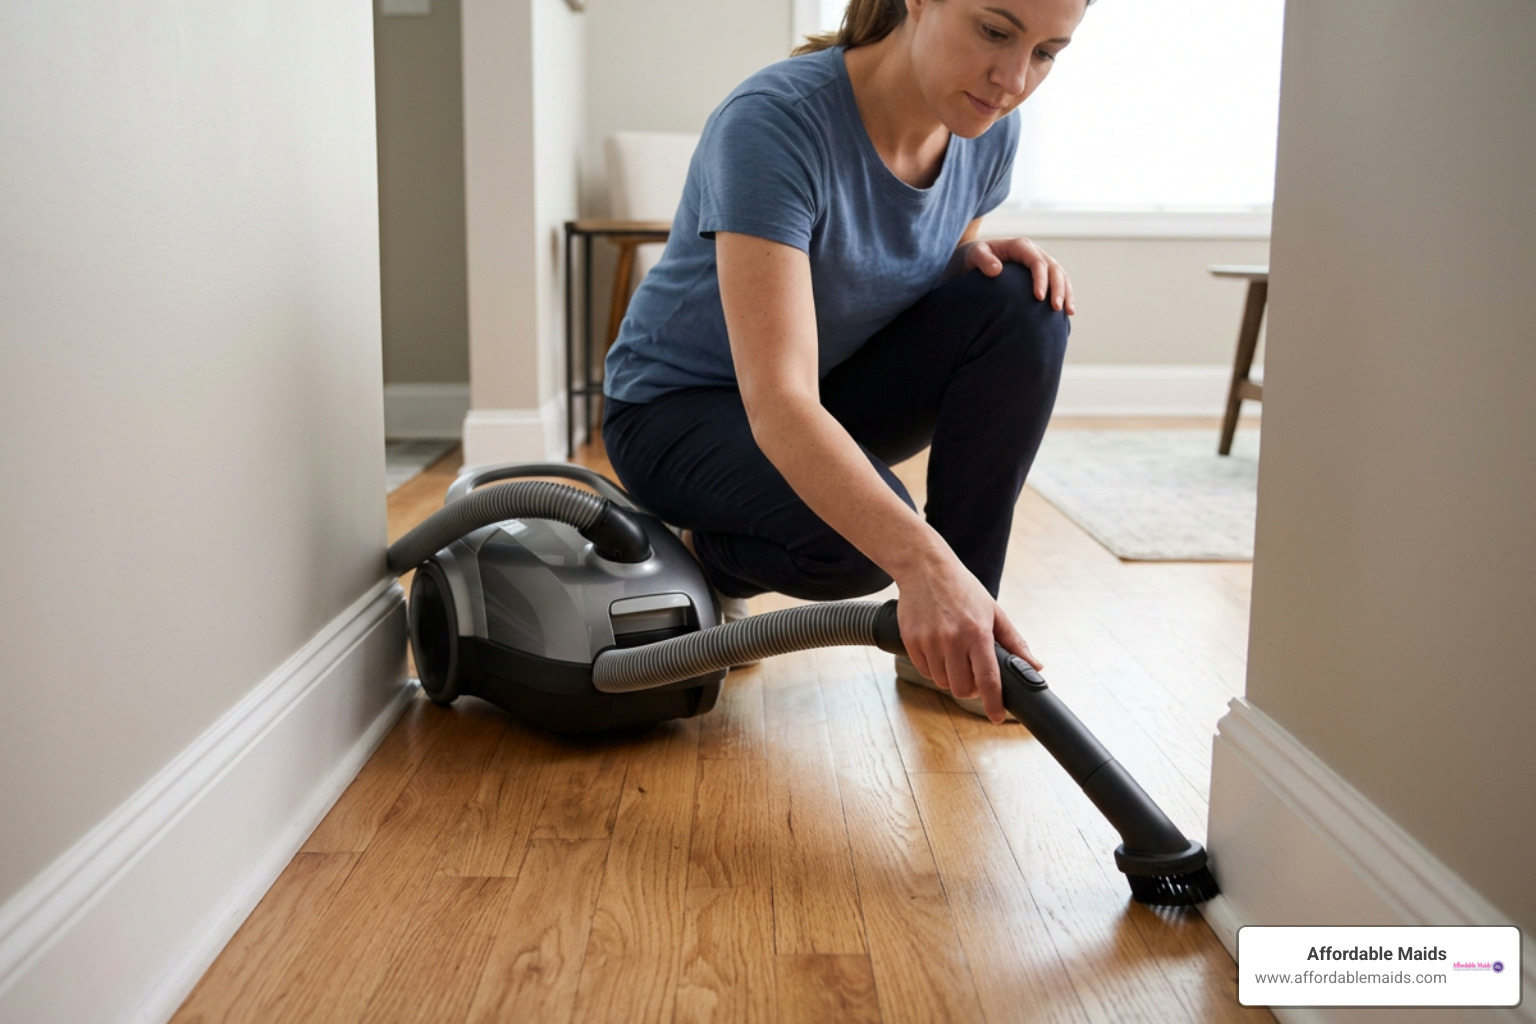
Start by running a vacuum brush attachment along the top edges of baseboard trim. Because baseboards collect shoe scuffs and falling dust, wipe them with a damp microfiber cloth after vacuuming. Pay special attention to cleaning high-touch areas such as baseboard corners near busy hallways. Use your vacuum’s narrow crevice tool to reach beneath sofas, media consoles, and low bed frames. Finish the entire room by running your HEPA vacuum across rugs and hard floors, followed by a damp mop on hard surfaces to lock in the clean.
Surface-Specific Dusting Methods for Every Room
Different surfaces in your home require distinct dusting techniques to avoid scratching delicate finishes or pushing grime deeper into materials.
What Is the Best Way to Dust a House Room by Room?
The table below outlines the ideal methods and tools for primary household surfaces:
| Surface Type | Recommended Tool | Method & Technique | What to Avoid |
|---|---|---|---|
| Solid Wood Furniture | Soft microfiber cloth (dry or barely damp) | Wipe along the direction of the wood grain; buff dry immediately | Harsh aerosol silicone sprays that create sticky buildup |
| Glass & Mirrors | Tightly woven microfiber glass cloth | Dry dust first to remove grit, then mist with plain water and wipe | Abrasive paper towels that leave lint and streaks |
| Electronics & Screens | Anti-static dry microfiber cloth | Power down devices; gently wipe screens without applying heavy pressure | Spraying liquids directly onto displays or ports |
| Upholstery & Textiles | Vacuum with upholstery brush attachment | Vacuum cushions slowly in overlapping strokes, then clean beneath cushions | Beating dusty cushions indoors without ventilation |
When dusting bedrooms, strip sheets and wash them on high heat to remove dead skin cells and dust mites. In kitchens, wipe the tops of upper cabinets and the refrigerator where grease bonds with floating dust. If you share your home with four-legged companions, applying practical pet-friendly cleaning tips—like regular vacuuming of pet beds—keeps floating fur and dander from migrating into freshly dusted living spaces.
Hidden Dust Hotspots Most Homeowners Miss
Even tidy homes harbor out-of-the-way locations that quietly gather dense layers of dust:
- Behind and underneath large appliances: Refrigerator condenser coils and laundry equipment vents collect thick lint that reduces operating efficiency.
- Fabric lampshades: Wiping with a cloth can crush dust into the weave; instead, roll a sticky lint roller gently over the exterior.
- Houseplant foliage: Broad-leaf indoor plants gather a fine film of room dust that blocks sunlight; gently wipe top leaf surfaces with a soft, lukewarm damp cloth.
- Door headers and window moldings: The top horizontal ledge of interior doors and window frames is an easy spot to overlook during quick cleans.
Preventive Habits to Keep Dust from Returning
Roughly 60% of household dust originates outdoors, hitchhiking inside on shoes, clothing, and open airflow. Implementing proactive habits helps cut down on airborne particles before they settle across your home.
HVAC Maintenance and Air Quality Control
Your home’s heating and cooling system can help reduce airborne dust when its filter is maintained properly. Choose a filter with an efficiency rating that is compatible with your HVAC system and follow the equipment manufacturer’s guidance for installation and replacement. Check the filter regularly and replace it when it is visibly dirty or when the recommended replacement interval arrives so airflow is not restricted.
Running an air purifier equipped with a True HEPA filter in bedrooms and main living spaces continuously captures airborne pollutants down to 0.3 microns. Maintaining indoor relative humidity between 40% and 50% also plays a key role. Proper humidity reduces static electricity that pulls dust onto surfaces, while keeping conditions inhospitable for dust mites, which thrive in four out of five U.S. homes.
Entryway Rules and Daily Clutter Management
Simple entryway adjustments dramatically decrease the amount of dirt crossing your threshold:
- Establish a strict no-shoes policy: Taking shoes off at the entrance can eliminate up to 80% of outdoor dirt and dust tracked inside.
- Use dual doormats: Place a coarse scraping mat outside exterior doors and an absorbent walk-off mat just inside.
- Brush pets regularly: Groom dogs and cats outdoors or near an easy-to-clean entryway to intercept loose fur and dander before it spreads.
- Minimize open tabletop clutter: Storing loose papers, knickknacks, and magazines inside closed storage bins leaves flat surfaces open for rapid wiping.
Developing simple habits for a dust-free home makes maintenance almost effortless between deeper cleaning sessions.
Establishing a Fast, Routine Dusting Schedule
Staying on top of dusting does not require hours of daily effort. Breaking tasks into manageable weekly and monthly intervals keeps your living spaces consistently fresh.
Weekly vs. Monthly Dusting Priorities
For day-to-day tidiness, reference the home cleaning checklist to balance high-traffic zones with seasonal deep-cleaning projects.
- Weekly priorities (15–20 minutes per room): Wipe down dining tables, coffee tables, television stands, nightstands, and open countertops. Run the HEPA vacuum across all floors.
- Monthly rotations: Dust ceiling fans, air intake grilles, window blinds, door frames, baseboards, and the floor areas beneath easily movable furniture.
- Caring for your tools: To ensure long-term cleaning performance, wash microfiber cloths in warm water using mild liquid detergent. Never use fabric softeners or dryer sheets, as they coat the synthetic fibers and destroy their electrostatic properties. Air-dry or tumble dry on low heat.
Frequently Asked Questions About Dusting
Why does my house get dusty so quickly after cleaning?
Rapid dust buildup is usually caused by unsealed window frames, gaps around exterior doors, dirty HVAC air filters, or leaky air ducts pulling dust from attic spaces. Synthetic fabrics, shedding pets, and high foot traffic also contribute to fast-accumulating surface debris.
Should you dust or vacuum first when cleaning a room?
Always dust before vacuuming. Dusting inevitably dislodges fine particles that drift downward. Waiting to vacuum and damp-mop until after you have dusted all upper and mid-level surfaces ensures you capture everything that fell during the cleaning process.
How do you properly wash and maintain microfiber dusting cloths?
Wash microfiber towels separately from lint-producing cotton fabrics using warm water and a basic, unscented liquid detergent. Avoid bleach and fabric softeners completely, and dry them on low heat or hang them to dry so the split fibers stay intact and magnetically attract dust.
Conclusion
Mastering a top-to-bottom dusting routine saves time, protects your furniture, and keeps indoor surfaces consistently clean. By ditching outdated feather dusters in favor of electrostatic microfiber tools, you can work through each room quickly without cleaning the same surfaces twice.
When daily schedules get hectic or your home needs a meticulous, comprehensive refresh from crown molding to baseboards, our professional team is ready to help. Discover how our recurring residential maid services can maintain a fresh, comfortable living environment for you and your family year-round.